Showing posts with label vegetables. Show all posts

Sunday, January 17, 2010

Turkey and Veggi Soup

Here in the frozen area of Upstate New York it's the season for soup! Today I will share with you one of my new favorites. Every time I make this soup it comes out a little different. This is because I am always changing up whats in it depending on what I have around and what looks good to me when I am at the store. Feel free to change this one up as you see fit or to make a smaller or larger batch depending on who you are having over for dinner. I give you Turkey and Veggie Soup!
250g bacon (or smoked pork product) - diced
2 medium onions - diced
3 carrots - diced
2 celery stalks - diced
4 turkey thighs – bite size pieces
4 cloves of garlic - crushed
4 cups turkey stock
400g crushed tomatoes
2 zucchinis - diced
400g (1 can) cannellini beans
2 handfuls baby spinach - chopped
1 handful napa cabbage – chopped
1 container small mushrooms (portabella, or baby brown)
parsley or basil (your choice), salt and pepper

Start off by putting a little olive oil in your pot and cooking the bacon for a few minutes. Then add your onions, carrots, and celery and sauté for about 10 minutes until the veggis have cooked a bit.
Next add your turkey and garlic and sauté until the turkey is cooked. Once this is done you can add a cup of white wine to deglaze the pan and simmer to reduce. I did not have any on hand this time to I omitted this from the ingredients above.
Now add your turkey stock. If you are like me you have a metric ton of the stuff left over from what you made during thanksgiving waiting to be used in your freezer. If not then just go buy some! I recommend getting the low or no sodium kind so you can season to your own taste. Along with the turkey stock add the tomatoes. Give it a stir and bring it to a boil. Simmer for 10 minutes.
Now add in your spinach, cabbage, mushrooms, beans, and zucchini. Then season to taste with herbs, salt and pepper. Simmer for about 10 more minutes.
I suggest serving this with a small pasta such as orzo. You can cook the pasta right in the soup if you wish but I suggest cooking separate and then adding it in. This is a fantastic hardy soup that just begs to be changed every time you make it. Also if you end up with too much left over this freezes really well. Simply heat in a pan on low! Helps take the chill of those bones on any chilly night!
Yes, this is what I look like when I cook on a Sunday!

Thursday, January 7, 2010

Winter Stew


While I was on holiday in the Northeast, I had my two and a half weeks of winter. Then I returned to Southern California where I walked around in my shirt sleeves after dark and thought about how happy I was to be back. But while I was East, I made a very wintery meal, which I will now share with you, to help you get through all those long, dark, cold days that you may or may not have ahead.

YOU WILL NEED:
4 white or yellow onions
6 or so fair sized red-skin potatoes
2 cloves of garlic
1 parsnip
1 turnip
1 yam
1 pound of carrots
1 large steak
Oregano, thyme, black pepper, tarragon and bay leaf to season.
Olive oil, to cook in.

Begin by chopping your onions and pressing your garlic. In this case, I chose to use a garlic
press instead of just chopping it, because I wanted it to infuse into the broth that I was making.
Chop two of your onions into into small pieces. Set the other two aside. Press both cloves of
garlic. Fry these two things in olive oil in the bottom of a large soup pot.

Next, you will need to cut up your meat.
Once you have done this, add it, and more oil, to your pot.

Fry it until all the meat appears cooked.

Then add six to eight cups of water and a teaspoon of salt. You have magically created beef broth, free of all the extra crap and packaging usually associated with beef broth!

Let it come to a boil as you chop your vegetables.

You will need to peel and cut the turnip, parsnip and yam. All vegetables should be cut to about the size of a quartered, small potato. You should leave the skins on the potatoes and carrots.
The skins add flavor and nutrients to your food. You might want to cut up your carrots into smaller, coin sized rings. That's what I do.

Add the veggies to the pot, and then season it well with Oregano, black pepper, two bay leaves, thyme and tarragon. Don't over do it, but don't under do it.
Then get it simmering and leave it there for a while, uncovered. With soups and stews, I have the following rule of thumb: if you want it to thicken, uncover it. If you want it to keep its moisture, cover it. Stews should thicken out.
Then go do something else for about an hour. I recommend Mario Kart Double Dash.
Once you've totally won against your siblings and become the queen of your household once again, or if you did something else, about an hour later, the soup will be ready. You should check it in between every couple of races... I mean, every fifteen minutes or so, to make sure
nothing is sticking or burning. If it is, reduce the heat.

When the soup is finished, the yam will have cooked into the broth and all the rest of the vegetables will be mushy and tender. The meat, in my case, was tender enough to cut with a
spoon.

Now, I like to eat garlic bread with stew, personally. Garlic bread is easy to make. Its very similar to the recipe for garlic bread stuffing, but here it is again, just in case:

You will need:
About a half a stick of butter
4 cloves of garlic
Oregano and basil, to season
Thick bread, sliced.

Arrange the bread slices on a cookie sheet. Preheat the oven to about 375. Then melt the butter in the microwave so it is a liquid. Use a garlic press, or cut the garlic by hand into small pieces, and add all of it to the liquified butter. Season it. Stir it up.
If you have a little brush, you can brush it on the bread. If not, you can sort of pour it on with a spoon.
Bake for about five to ten minutes, keeping a weather eye, to make sure the bread gets to be your desired amount of crunchy without burning.

Dip the garlic bread in the soup. Mmmmmmm.

Friday, November 20, 2009

Good noms presents chili (non-veg)

If there is anything anyone knows about my cooking style, it's that I'm not much of a cook. I know how to make maybe a half dozen recipes from my head. Of course, I can usually follow directions well enough to concoct something roughly resembling a new dish, but the real chef in the family is my future husband.
With that said, I eat home cooked meals every day. This is easier on the wallet (everyone knows that cooking for yourself is cheaper than having someone else do it for you), but it wasn't always healthier. I gained a little weight in the recent months.
But we made a vow to make a solid effort to eat naturally, and healthily, and so I present to you an almost all natural version of chili!
Soooo you will need:
  • About 2 lbs ground beef
  • 2 green bell peppers
  • 2-3 tomatoes
  • 1 to 2 large onions
  • 2-3 jalapenos
  • 1lb red kidney beans
  • 1/2 lb black beans
  • 1 can tomato paste
  • 2 cups beef broth
  • taco seasoning, salt, pepper, garlic
You might notice that many of these measurements are not precise. This is because you can make a good chili a number of ways. If you want a hot chili you will add more peppers. If you aren't big on onions you can have fewer. It's like your own custom chili generator!
This moves us on to the next part of the post - or How To Cook Your Chili. For your sake and those you like to feed, I hope you own (or can borrow) a Crock Pot. Basically, if I were told I was going to a deserted island... with electricity.. or I I were told that my house were burning and I only could save two appliances... anyway, no kitchen should be without a Kitchenaid mixer and a crockpot. Why? Because if you have a stand mixer and good accessories for it you will not need any other appliance (except a coffee maker if you're into that). You might not save money (most accessories for a Kitchenaid cost as much as a stand alone appliance that does about the same thing) but you will save counter space. And a crockpot is essential if you like hearty, warm homecooked meals and have to work 8 hours a day.
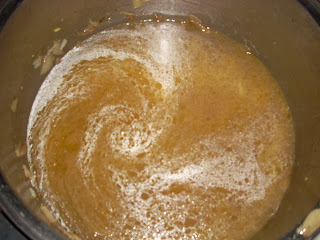
Back to chili. We start by rinsing and boiling the beans. You can use canned beans and skip this step. I like to use products that are as close to their original state as possible, so ideally I'd go to the farmers market and buy some beans there (I miss NY) but that's not an option so I got the middle choice of beans in a bag from a store. You have to boil them for a minute and then let them chill out in a bowl (if you look this up, this is not only so that they can be more delicious, but so that you don't get a stomach ache).
Here are some beans that have been boiled and are now chilling in a bowl of water. They look kind of wrinkly and gross, but that doesn't matter because they aren't trying to win a beauty contest (only a deliciousness contest).
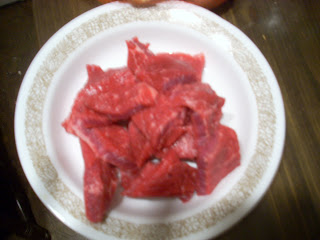
Next we will brown the meat. Allow me to insert another Kitchenaid plug here. Ground beef doesn't go on sale very often at our local grocery store. However, various other kinds of meat do. Sometimes for as cheap as a dollar. We got the food grinder attachment for our mixer and I'm pretty sure it's paid for itself by now (or very nearly did) in money we saved buying and grinding our own meat (freeze it for burgers, meatloaf (especially easy since it's a mix of different meats anyway), tacos, nachos, pasta sauce, the list goes on).
So we are browning the meat, which is super juicy because it's part leaner beef ground at the store, part more fatty beef we did ourselves. Use a packet of taco seasoning to spice it up (after you drain it). Some garlic can't hurt either, if you have it handy.
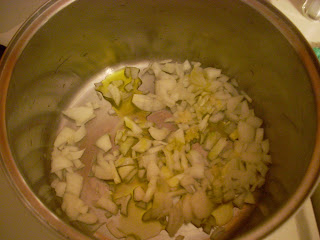
Veggies are easy. Chop up those onions, peppers and tomatoes. Wear gloves when de-veining the jalapenos, or wash your hands and don't touch your eyes. 
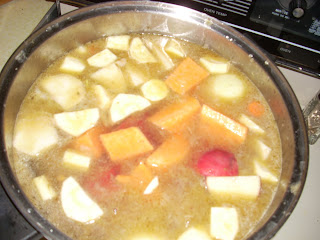
Next comes the most difficult part. Brace yourselves. Dump all your ingredients into your (5 quart) crock pot and go to sleep (it helps to dissolve the tomato paste in some broth).When you wake up, it will look like this.
I served mine over rice. By the way, that much cheese on top of anything is not healthy. And the slice of what could be vanilla cheesecake is actually cornbread. Fitting, no? Bon appetit!