Monday, November 30, 2009

Lovely holiday apple cake!

This cake is full of apples, coconut, and walnuts, and is so dense you could lob it at Santa and mug him for presents while he is unconscious and entering a brown-sugar-butter-sauce coma.
Okay, maybe that isn't a good idea. But hopefully laughter or outrage will make you forget the fact that I forgot my usual ingredient shot.
Regardless, I got this recipe after our annual bake sale at work. I don't know what book it came from, so if anybody recognizes it, do tell!

Step 1: Ingredients

Cake
3 eggs
1 1/4 cups oil
2 tsp vanilla
2 tsp brandy
2 cups sugar
2 3/4 plus 1/4 cups flour, divided
3 cups of apples, chopped
1 cup walnuts, chopped
1 cup coconut
1/3 cup butter

Topping
1 cup brown sugar
1/4 cup milk
1 tsp vanilla
1 tsp brandy

Step 2: Prep

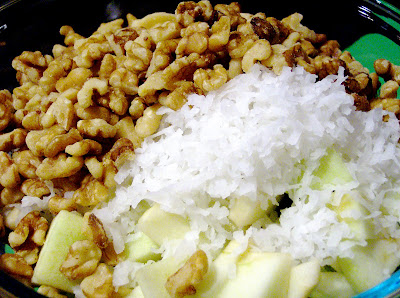
Preheat the oven to 350 degrees. Grease and flour a 9" tube pan. Peel and chop the apples. I used one and half ginormous Granny Smiths. Mix them with the 1/4 cup of flour, nuts, and coconut. Set aside.

Lovely!


Step 3: Beat the eggs well. Add the oil, vanilla, brandy, and sugar, again beating well.

Step 4: Sift in the remaining flour, the soda, salt, and nutmeg.


If you are a little weird about your food like we at Good Noms are, you'll probably grind your cinnamon fresh. Why do this and get the nutmeg out of a shaker bottle? Here's why:


After you grind your cinnamon in your coffee grinder, your next few cups will be extra delicious, infused with a delicate cinnamon flavor. Yum!

Step 5: Fold in apple mixture.

Step 6: Pour batter (which will more resemble dough than batter) into the pan. Bake for 70 minutes or until a knife inserted into the center comes out clean. Set the pan on a cooling rack.


Step 7: Put the sauce ingredients into a small pan over medium high heat. Boil for 2 to 3 minutes.


Step 8: Turn the cake out onto a plate large enough to catch any sauce fallout. Jab the cake with a fork so that the sauce will soak in better. Pour or spoon sauce over the cake. I suppose you could serve it warm, but that would risk losing the sauce while it is still very runny and liquid. When it's at room temperature, it it nice and thick and won't ooze off as you serve.

Naked cake

Oh my.


Delicious!

Friday, November 27, 2009

Good Noms celebrates late Thanksgiving

Today Good Noms brings you a delicious and natural alternative to the jiggly and ribbed canned cranberry sauce. This recipe is really easy to make, tastes great, and is a hit with most eaters.
You will need:
  • 1 cup orange juice.
  • between 1/2 and 1 cup sugar. I used closer to 1/2 because it seemed 1 full cup made the sauce too sweet (for me) last time.
  • 1 package cranberries
Heat up the o-j and the sugar in a pot so that the sugar dissolves. Add the cranberries.
You will then bring the pot to a boil (the skins on the berries will begin to pop), and then simmer it for about 15 minutes. The berries will begin to lose their shape, and the sugar juice will begin to turn red. Transfer to a dish and chill for a while before serving (but don't worry too much because we ate ours still warm this year and it was still good).

All in all I had to think a lot about what I was going to write about this week as my co-chef and I are traveling all over NY this week (say hello to future in-laws kitchen!). As you see with minimum effort and time even more delicious food (as opposed to traditional Thanksgiving fare) is possible. I also made a pie (which isn't Good-Noms worthy due to store-bought crust). Happy Thanksgiving.

Thursday, November 26, 2009

Bruschetta Pasta!

After the ups and downs of an extremely busy past couple of weeks, you, dear reader, are finally given a post from your third author: A.K. My needs when cooking are simple: I want to enjoy food the way it was meant to exist, to prepare as much as possible from scratch, to avoid eating foods that my body cannot handle and to make things as delicious as possible! I strive to eat all natural, all the time and to only eat "whole corn", meaning, to me, kernel corn or course ground cornmeal. My recipes may also sometimes lack certain things, simply due to my long list of food allergies.
Now, without further ado, onto my first recipe for you! I present a favorite, simple dish: Brushetta Pasta.

To prepare this, you will need:
  • Pasta. I am still using pre-prepared pasta, so I use about 3/4 a box. If you make your own, more power to you! Simply prepare enough for the amount of people you wish to serve.
  • Six fresh tomatoes
  • Three cloves fresh garlic
  • 1 large onion
  • 1 tablespoon extra virgin olive oil
  • 1/2 cup fresh basil leaves
  • Mozzarella or parmesan cheese, to taste (optional)
1) Prepare pasta as one normally would, by boiling it in water with a little salt and olive oil, or however you prefer to.

2) While this is cooking, begin by chopping all six tomatoes, being careful to save the juices. I like to chop them into chunks about the size of your average dice (this analogy is made more complicated if you, like me, are a huge geek. I am thinking of a standard D6, geeky friends!). You can then set these chopped tomatoes aside in a bowl. I do this first to allow the tomatoes to sit and let the juices flow out of them a bit.

3) Next, I chop the onion and garlic. I like to dice my onions to be fairly small, but leave my garlic in medium sized pieces, perhaps two millimeter cubes. While you are making preparations, you should wash and tear up or cut your basil into small pieces, tearing or cutting each leaf into at least quarters. I usually simply rip herbs and greens instead of cutting them because it makes them less smushed, but the choice is yours. Set the basil aside once you have prepared it.

4) Following this, place the onions and garlic in the pot you plan to cook in with the olive oil. I generally cook almost everything except stews and soups in a large wok, but if that is not available to you, use a good sized sauce pan. Fry the onions and garlic in the oil until they are soft and they fill your kitchen with a wonderful aroma.

5) Add the basil and cook it in the oil with the onions for a bit so that it gets soft and the flavors mix. At this stage of cooking it is hard to give a time estimation, but I would suggest a couple of minutes, while keeping a weather eye on things and making sure to stir continuously.

6) Once things are fragrant and looking delicious, add your tomatoes. Stir everything up. Allow these to come to a boil and then let them simmer for about fifteen minutes, or until your sauce is of the desired texture. It should yield a very chunky sauce that has little in common with a standard tomato sauce, since there are no crushed tomatoes involved.

7) Serve over your choice of pasta, which should have been finished and drained at some point. If you wish, you may choose to add mozzarella or parmesan cheese to the top, but it certainly isn't nessesary. Season each portion with salt as desired. I like to add salt to tomatoes all the time, but my partner prefers to allow the basil to speak more strongly.

8) Enjoy. This is a good nom!

Monday, November 23, 2009

How to make delicious pancakes...

...And make people love you.

The fiance and I have Pancake Sunday every week. It used to be Cinnamon Roll Sunday, but they are just too packaged and processed for us to buy.

NOW, before we start, let's talk spatulas! Unfortunately, you get what you pay for. This baby cost me sixteen bucks, but let me tell you why it is so great. Silicone or plastic is easier to get under your cake than metal. Metal doesn't bend or warp (as much) over repeated use/dishwashing. This one is a metal spatula with silicone on the outside! WORTH THE MONEY! If you are going to make flip-necessary food, invest in a good spatula!


Step the First: Ingredients!


1 1/2 cups flour
3 tablespoons sugar
1 tablespoon baking powder
2 large eggs
1 1/2 cups buttermilk or sour milk
1/2 teaspoon pure vanilla extract
1 stick of butter (we won't use all of it)
1/3 - 1/2 cup pecans (optional)

Step 2: If you don't have buttermilk, start by making yourself some sour milk. Measure out 1 1/4 cups of milk and add a tablespoon of white vinegar. Let it sit on the counter for ten minutes and get all gloopy and gross. The reason I tell you to use less milk than buttermilk is because buttermilk tends to be a lot thicker and make a thicker batter than plain milk.

Step 3: Grab a large frying pan. If we were a super fancy blog, we would tell you to pull out a saute pan. But in my house, it is a frying pan. Be sure to put it on the range at medium-high heat so it's nice and hot BEFORE you start trying to put pancakes on there. This way you'll have pancakes that are consistently cooked throughout all the batches.

Step 4: Using a whisk or fork, beat eggs until smooth.


Step 5: Add 1 cup of the milk and the vanilla and whisk that in until combined.


Step 6: Add dry ingredients and beat in. For the love of Pete, do not overbeat this. A few small lumps here and there are totally okay in pancakes.


Step 7: Take a look at your batter. It's probably too thick, so slowly whisk in the remaining milk until it looks to be the right consistency, like a slightly too-thin cake batter. You may need to add a little more than called for. The reason the batter should be so thin is to get a nice evenly cooked pancake. Not to mention that if you have kids, you can do what my mom did when my brother and I were munchkins; make freehand pancake shapes. Pumpkins, apples, and round little baby chicks were our favorites! Here's how it should look:


Step 8: Butter! Use about this much:


Step 9: Gently pour 1/3 cup of the batter into the pan. It'll make a 4" - 5" pancake. If you are using pecans (or blueberries, or grated apple, or CHOCOLATE CHIPS) sprinkle them on now.


Step 10: Watch for bubbles. When there are some nice-looking bubbles happening, and the edge is golden-brown...flip!


Step 11: Serve with a big glob of butter and whatever other toppings you like.


Step 12: Bask in the compliments of your family and friends.

Friday, November 20, 2009

Good noms presents chili (non-veg)

If there is anything anyone knows about my cooking style, it's that I'm not much of a cook. I know how to make maybe a half dozen recipes from my head. Of course, I can usually follow directions well enough to concoct something roughly resembling a new dish, but the real chef in the family is my future husband.
With that said, I eat home cooked meals every day. This is easier on the wallet (everyone knows that cooking for yourself is cheaper than having someone else do it for you), but it wasn't always healthier. I gained a little weight in the recent months.
But we made a vow to make a solid effort to eat naturally, and healthily, and so I present to you an almost all natural version of chili!
Soooo you will need:
  • About 2 lbs ground beef
  • 2 green bell peppers
  • 2-3 tomatoes
  • 1 to 2 large onions
  • 2-3 jalapenos
  • 1lb red kidney beans
  • 1/2 lb black beans
  • 1 can tomato paste
  • 2 cups beef broth
  • taco seasoning, salt, pepper, garlic
You might notice that many of these measurements are not precise. This is because you can make a good chili a number of ways. If you want a hot chili you will add more peppers. If you aren't big on onions you can have fewer. It's like your own custom chili generator!
This moves us on to the next part of the post - or How To Cook Your Chili. For your sake and those you like to feed, I hope you own (or can borrow) a Crock Pot. Basically, if I were told I was going to a deserted island... with electricity.. or I I were told that my house were burning and I only could save two appliances... anyway, no kitchen should be without a Kitchenaid mixer and a crockpot. Why? Because if you have a stand mixer and good accessories for it you will not need any other appliance (except a coffee maker if you're into that). You might not save money (most accessories for a Kitchenaid cost as much as a stand alone appliance that does about the same thing) but you will save counter space. And a crockpot is essential if you like hearty, warm homecooked meals and have to work 8 hours a day.
Back to chili. We start by rinsing and boiling the beans. You can use canned beans and skip this step. I like to use products that are as close to their original state as possible, so ideally I'd go to the farmers market and buy some beans there (I miss NY) but that's not an option so I got the middle choice of beans in a bag from a store. You have to boil them for a minute and then let them chill out in a bowl (if you look this up, this is not only so that they can be more delicious, but so that you don't get a stomach ache).
Here are some beans that have been boiled and are now chilling in a bowl of water. They look kind of wrinkly and gross, but that doesn't matter because they aren't trying to win a beauty contest (only a deliciousness contest).
Next we will brown the meat. Allow me to insert another Kitchenaid plug here. Ground beef doesn't go on sale very often at our local grocery store. However, various other kinds of meat do. Sometimes for as cheap as a dollar. We got the food grinder attachment for our mixer and I'm pretty sure it's paid for itself by now (or very nearly did) in money we saved buying and grinding our own meat (freeze it for burgers, meatloaf (especially easy since it's a mix of different meats anyway), tacos, nachos, pasta sauce, the list goes on).
So we are browning the meat, which is super juicy because it's part leaner beef ground at the store, part more fatty beef we did ourselves. Use a packet of taco seasoning to spice it up (after you drain it). Some garlic can't hurt either, if you have it handy.Veggies are easy. Chop up those onions, peppers and tomatoes. Wear gloves when de-veining the jalapenos, or wash your hands and don't touch your eyes. Next comes the most difficult part. Brace yourselves. Dump all your ingredients into your (5 quart) crock pot and go to sleep (it helps to dissolve the tomato paste in some broth).When you wake up, it will look like this.
I served mine over rice. By the way, that much cheese on top of anything is not healthy. And the slice of what could be vanilla cheesecake is actually cornbread. Fitting, no? Bon appetit!

Sunday, November 15, 2009

Welcome to Good Noms

Hello, and Welcome to Good Noms!

For our first recipe, I'll walk you through my latest adventure in baking, an adapted version of Cakespy's Cranberry Bliss Bars.
My usual cooking style involves a lot of fooling around with substitutions, mangling recipes to my own tastes...and my fiance's pickiness. Therefore I present to you...

Good Noms' Cherry Bars!

Step 1: Gather up your ingredients.


Cake base
2 sticks (1 cup) butter, softened
1 1/4 cups dark brown sugar, firmly packed
3 large eggs
1/2 teaspoon ground nutmeg (optional)
1 1/2 teaspoons vanilla
1 tablespoon brandy
1/2 teaspoon salt (omit if using salted butter)
1 1/2 cups flour
1/2 cup dried cherries
1/2 cup white chocolate chips

Frosting
4 ounces cream cheese, softened
1 1/2 cups confectioners' sugar
2 tablespoons butter, softened
1 teaspoon vanilla
1/2 teaspoon lemon zest
dash of salt (omit if using salted butter)

Garnish
1/3 cup white chocolate chips
1/2 cup dried cherries

Step 2: Preheat oven to 350ยบ F. Lightly grease a 9" x 13" baking pan.

Step 3: Cream together the butter and sugar. It's really important to use softened butter, not melted butter, because the creamed butter and sugar add air to the batter, giving the end product a better texture.

Step 4: Add the vanilla, and the eggs, one at a time. Beat well after every addition. Now is the time to add the brandy as well, if you have it. I keep a well stocked liquor cabinet solely for cooking purposes. If you don't have any brandy, grand marnier, dark rum, or some other sweet liqueur will work just as well.

Step 5: Add in the dry ingredients. I have added some baking soda to the original recipe for a more tender, cakey bite. Because I love cake.


Step 6: Cherries and chocolate. You can use regular chocolate in place of white chocolate if you like, but inexplicably, I like white chocolate better in some recipes. DO NOT tell my mother this. White chocolate is one of several foods against which she has a vendetta.


Step 7: Bake for 30 mins, or until golden and a knife inserted in the center of the pan comes out clean (or mostly clean, depending on how many chocolate chips you run into). Cool completely before moving on to the frosting.


Frosting:

Step 1: Blend cream cheese, butter, and vanilla in a bowl slightly larger than you think you will need. The confectioner's sugar will make a bit of a mess if you let it.

Step 2: Add in the sugar a little bit at a time, until fully incorporated.

Step 3: Glob onto your cooled bars and top with cherries.


Step 4: Lick spoon.

Topping:

Step 1: In a double boiler, melt chocolate chips. If the chocolate seems to be too thick to drizzle, add a little shortening to thin it out. Don't worry, this won't change the flavor or texture of your chocolate once it's cooled.


A saucepan and Pyrex bowl make a good makeshift double boiler

Step 2: Drizzle chocolate over your bars. Cut the bars while the chocolate is still melty or it will crumble and your bars won't look as nice when cut. Cut in half lengthwise and into four wide. Cut each rectangle into two triangles.

Step 3: Enjoy!

Eat with a cup of French Roast for maximum enjoyment!